How to increase the size of the volume in AWS Linux Server
April 27, 2020 / Nirav Shah
Increase EBS Volume Size In AWS Linux Server
To increase the size of your volume from console side please follow the steps given below :

- Step 2
- Click on “Service“ located on the top left corner of console


- Step 4
- Select “Volume“ on the left side of the console


- Step 6 ( Optional )
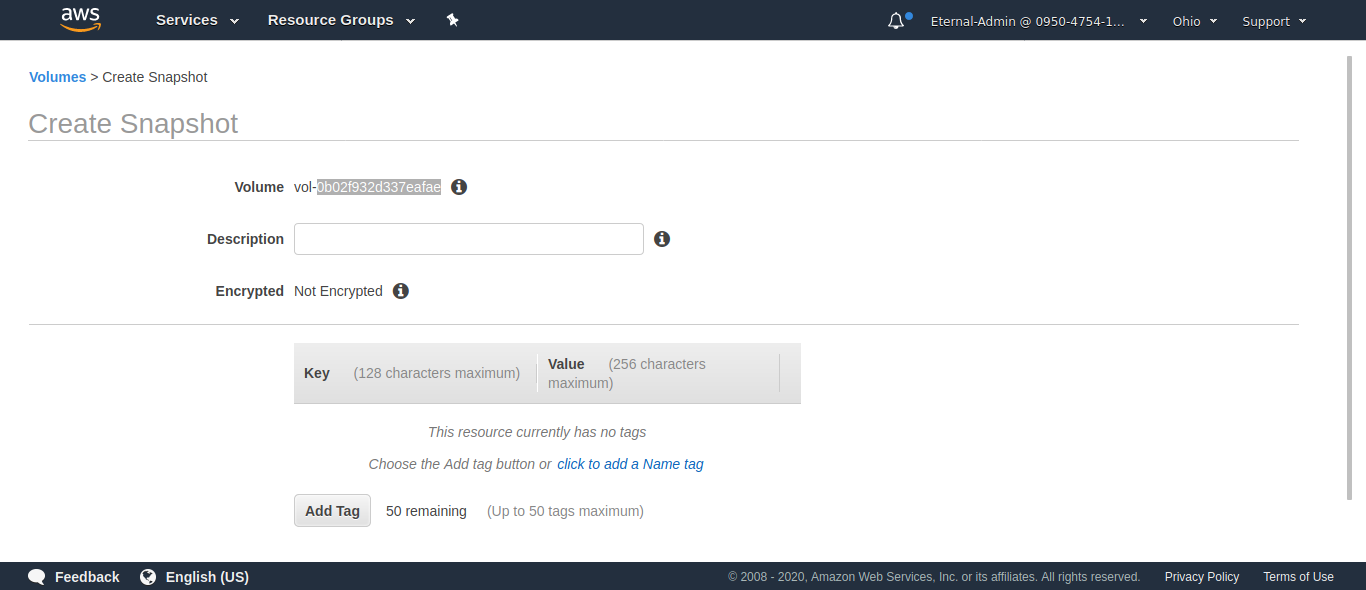
- If you don’t want to create a snapshot please skip and jump to step 7
- Click on “Create Snapshot”


- Step 8
- Find the size field which will show the current “Size“ of the volume


Increasing space in the linux server
- After you increment the size of an EBS volume, you must use a file system–specific commands to extend the file system to the larger size. You can resize the file system while you are working on it.
Just For Information
- Before extending a file system that contains valuable data, it is best practice to create a snapshot of the volume, in case you need to roll back your changes. For more information, see Creating Amazon EBS Snapshots.
To verify the file system of the instance connect and run the file -s command.
Command for file systems on a Nitro-based Instance
$ sudo file -s /dev/nvme?n*
Command for file systems on a T2 Instance
$ sudo file -s /dev/xvd*
Extending a Partition
- Increasing the size of from console side will not increase the size of the volume inside the server
- Use the lsblk command to display information about the block devices attached to your instance
Example: Partitions on a Nitro-based Instance
-
- The following example shows the volumes on a Nitro-based instance:
$ lsblk
-
- NAME MAJ:MIN RM SIZE RO TYPE MOUNTPOINT
- nvme0n1 259:0 0 600G 0 disk
- └─nvme0n1p1 259:1 0 400G 0 part /
- The root volume, /dev/nvme0n1, has a partition, /dev/nvme0n1p1. While the size of the root volume reflects the new size, 600 GB, the size of the partition reflects the original size, 400 GB, and must be extended before you can extend the file system.
- To extend the partition on the root volume, use the following growpart command.
$ sudo growpart /dev/nvme0n1 1
-
- TYou can verify that the partition reflects the increased volume size by using the lsblk command again.
$ lsblk
-
- NAME MAJ:MIN RM SIZE RO TYPE MOUNTPOINT
- nvme0n1 259:0 0 600G 0 disk
- └─nvme0n1p1 259:1 0 600G 0 part /
Example: Partitions on a T2 Instance
-
- The following example shows the volumes on a T2 instance:
$ lsblk
-
-
- NAME MAJ:MIN RM SIZE RO TYPE MOUNTPOINT
- xvda 202:0 0 600G 0 disk
- └─xvda1 202:1 0 400G 0 part /
- The root volume, /dev/xvda, has a partition, /dev/xvda1. While the size of the volume is 600 GB, the size of the partition is still 400 GB and must be extended.
- To extend the partition on each volume, use the following growpart commands.
$ sudo growpart /dev/xvda 1
- You can verify that the partitions reflect the increased volume size by using the lsblk command again.
$ lsblk
- NAME MAJ:MIN RM SIZE RO TYPE MOUNTPOINT
- xvda 202:0 0 16G 0 disk
- └─xvda1 202:1 0 16G 0 part /
- Now just restart your server and space will be increased
Also read : EC2 X2gd Instances – Graviton2 Power for Memory-Intensive Workloads


